Drag

Facebook

Facebook

⇄

To push leads from Facebook to your KONDESK, here are the complete following steps:

Deployment Type
Kondesk Platform
Published Date
March 27, 2023
Category
Lead
Support Requests
  • The Facebook integration into KONDESK sets up a seamless transfer of your lead data from your Facebook accounts to your KONDESK CRM. It allows you to track all your leads from Facebook in real-time, by syncing your Facebook LeadGen form with KONDESK.
  • You must have an active Facebook ads page with a LeadGen form on it.
  • You must have an active Facebook Business.
    To push leads from Facebook to your KONDESK, here are the complete following steps:
  • Integrate Facebook to the KONDESK using Authentication click on the “Configure” and fill the credentials the account will be connected to the KONDESK.
  • After the integration list of Facebook pages will be visible/click on the “Map Facebook form filed with KONDESK” to view the list of pages.
  • Map the Facebook form fields to the corresponding KONDESK lead fields.
  • Allow the Lead access permission to transfer lead data from Facebook to KONDESK
  • The leads will be visible in the Enquiry section in the Active Online Enquiry.
  • Create a test lead on Facebook, and ensure the lead data is pushed to KONDESK
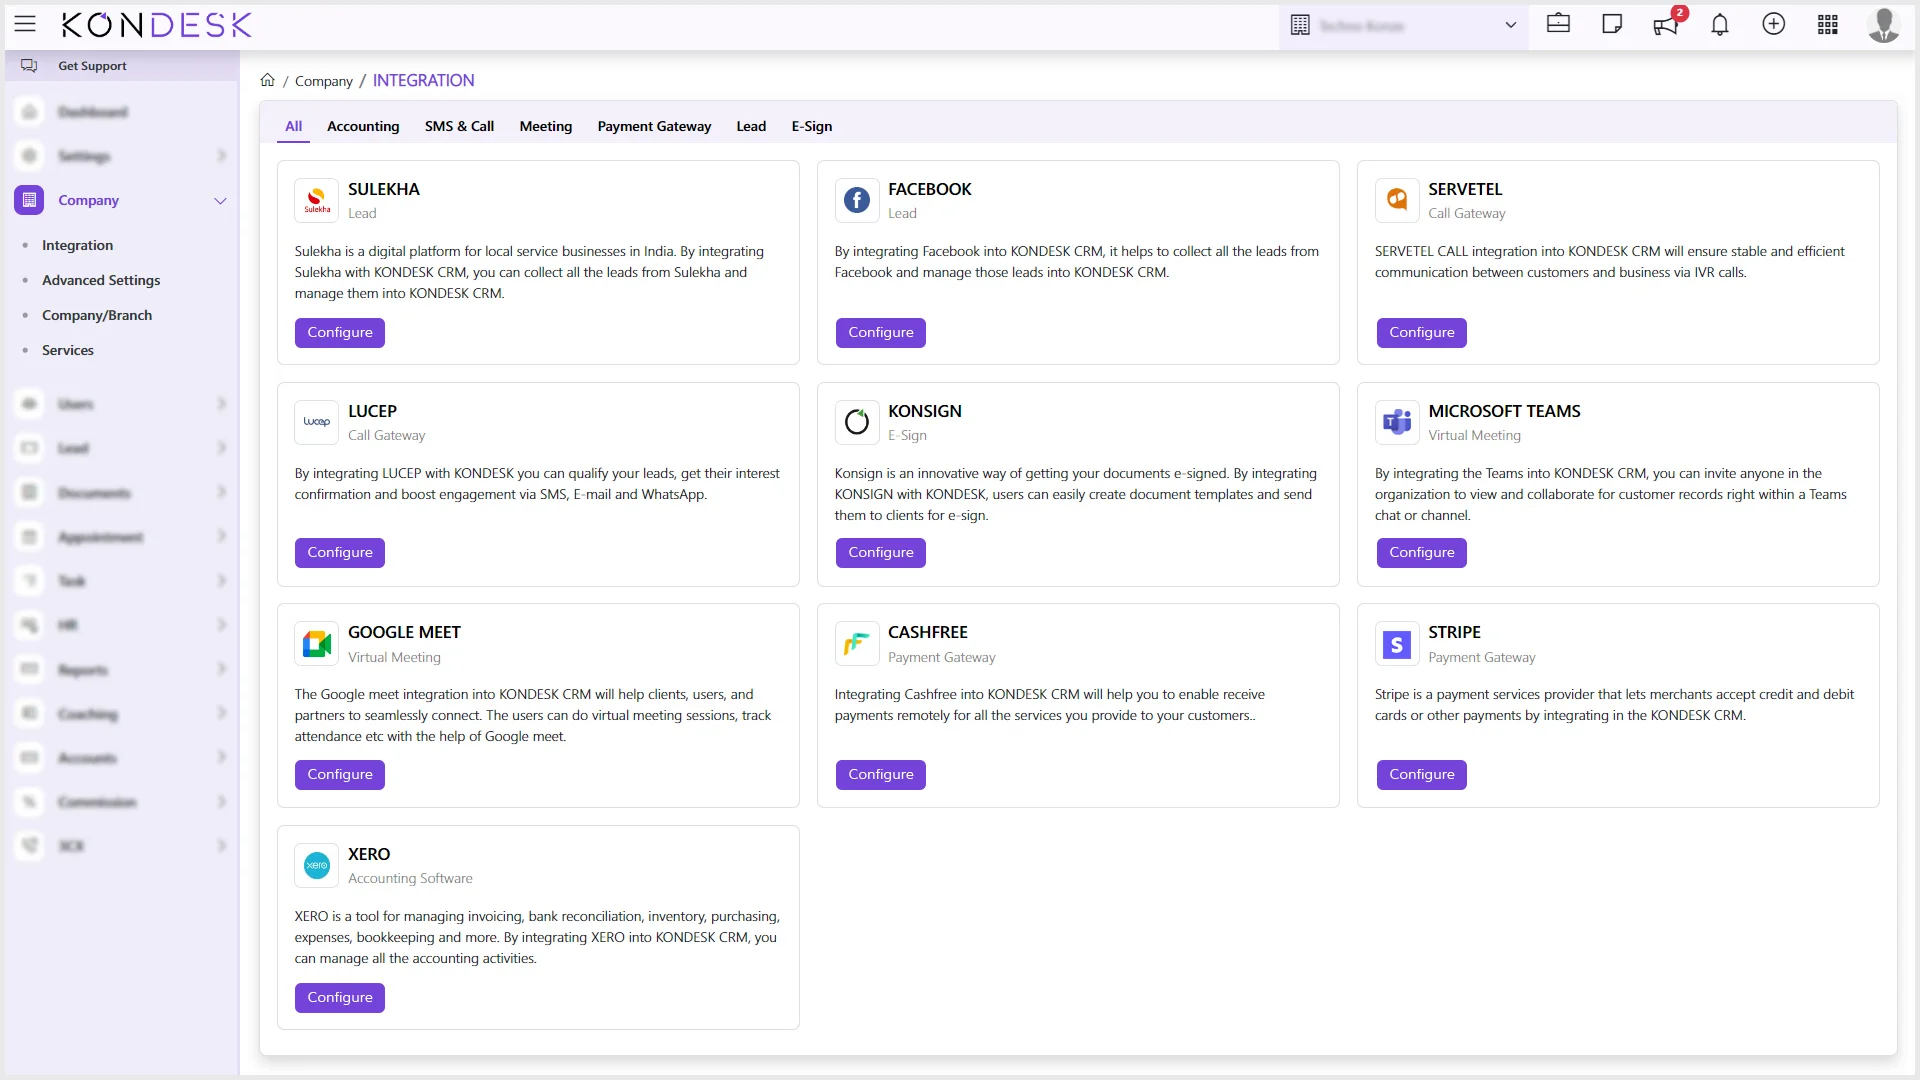
Step 1: Go to the menu on the left-hand penal click on Company > Integration > click on the Facebook Configure.
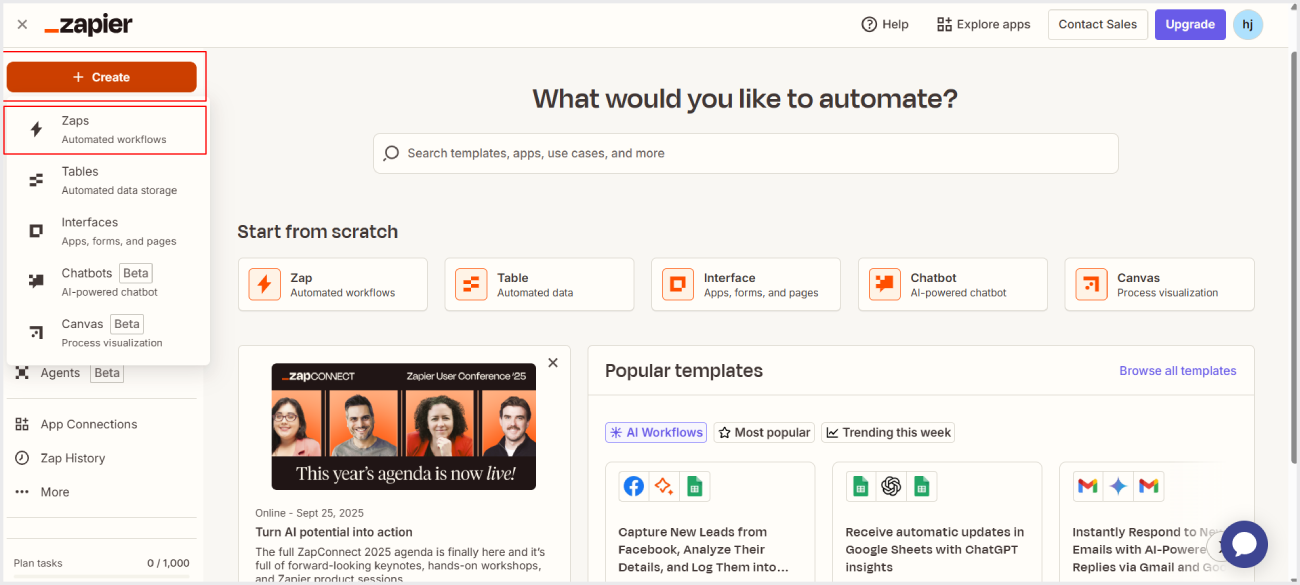
Step 2 : Create a new Zap on Zapier, using any compatible app (e.g., WhatsApp) as the Trigger and KONDESK as the Action as shown below.
Step 3 : In the Trigger App, configure the required fields and make sure to include the below-specified Tags (at least the required tags must be added).
Left columnRight column
First Name*Last Name
Email Address*Date Of Birth
Phone Number*National Code
NationalityMessage
Address Line 1Address Line 2
CountryState
CityZip Code
Inquiry TypeUTM Source
UTM MediumGender
Step 4 : Set up, configure, and test the Trigger (first app) to ensure it is capturing the required data correctly.
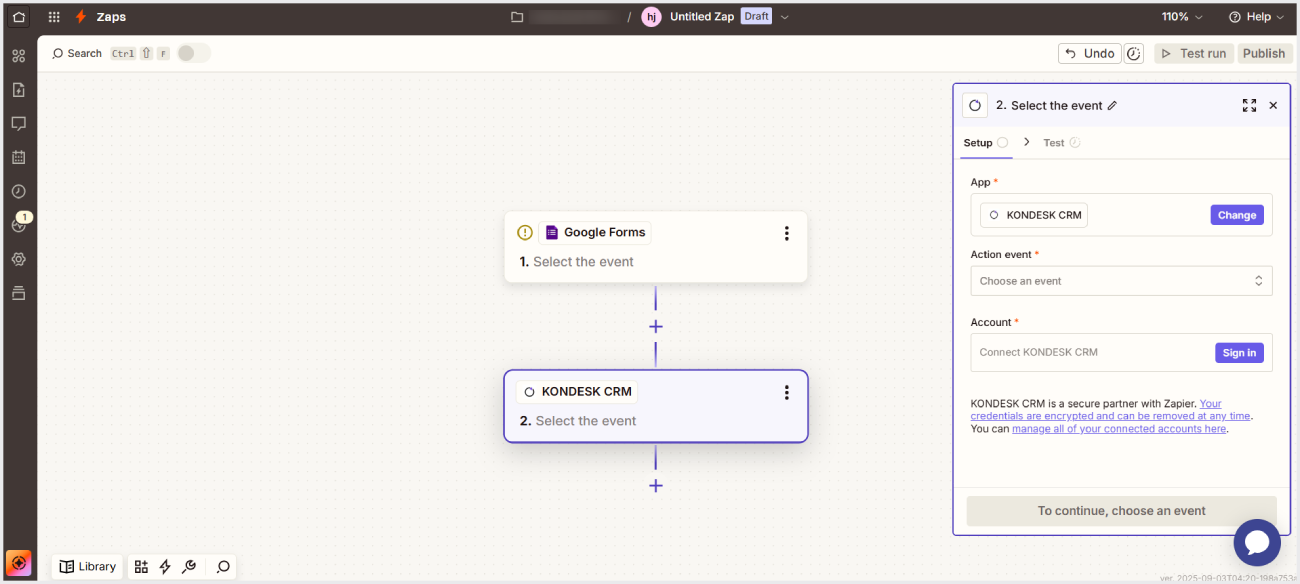
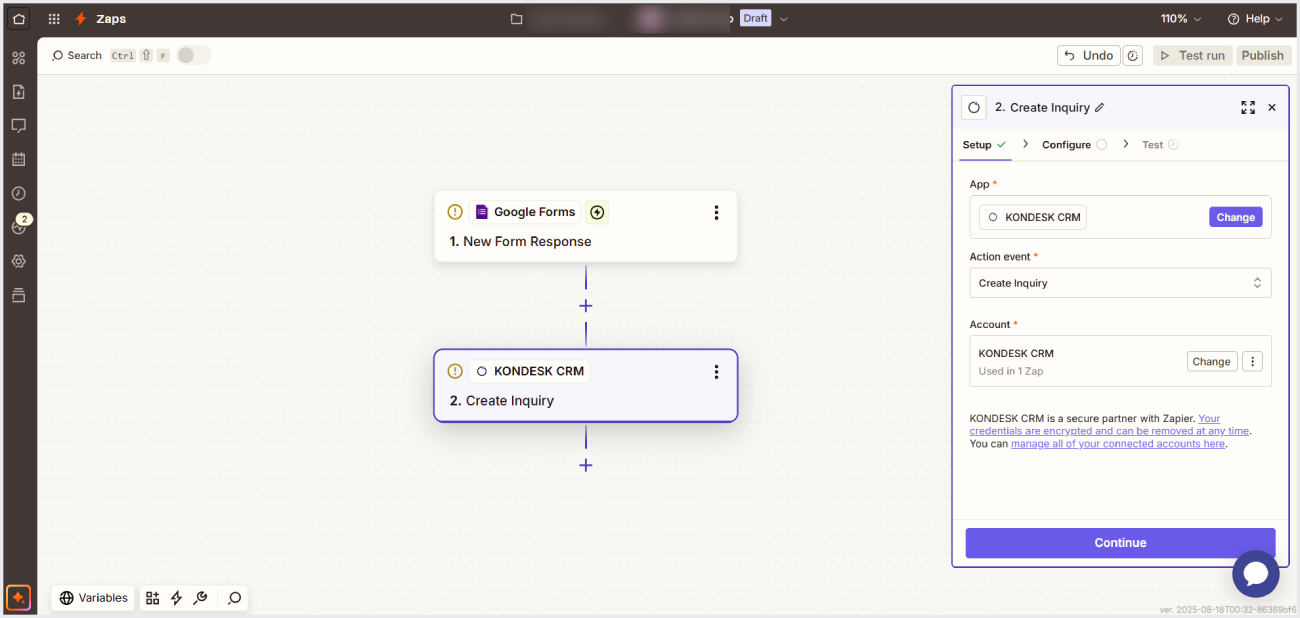
Step 5 : In the second step (Action), select KONDESK as the App. Choose Create Enquiry as the Action Event, then connect your KONDESK account by entering your credentials. Once connected, click Continue as shown below.
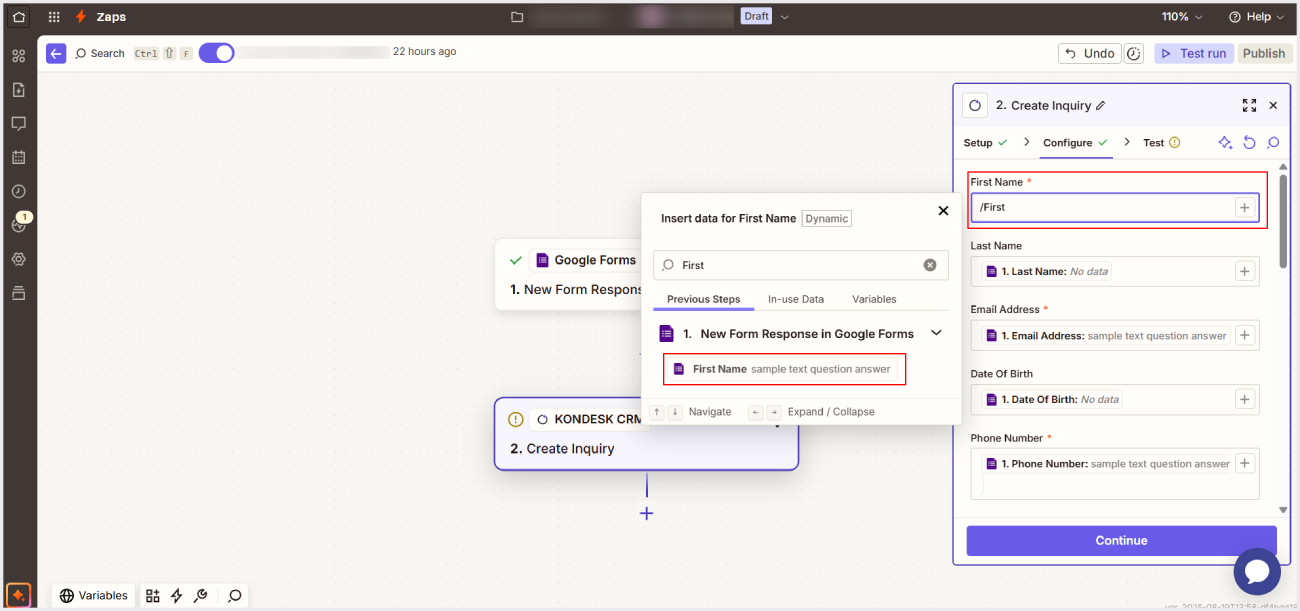
Step 6 : You will now see a list of fields required to create an enquiry in KONDESK in Configure tab. Map each field with the corresponding field from the Trigger App by typing: /Field_Name.
 Step 7 :For example, in the First Name field, enter /First Name as shown below. Complete all the fields in the same manner.
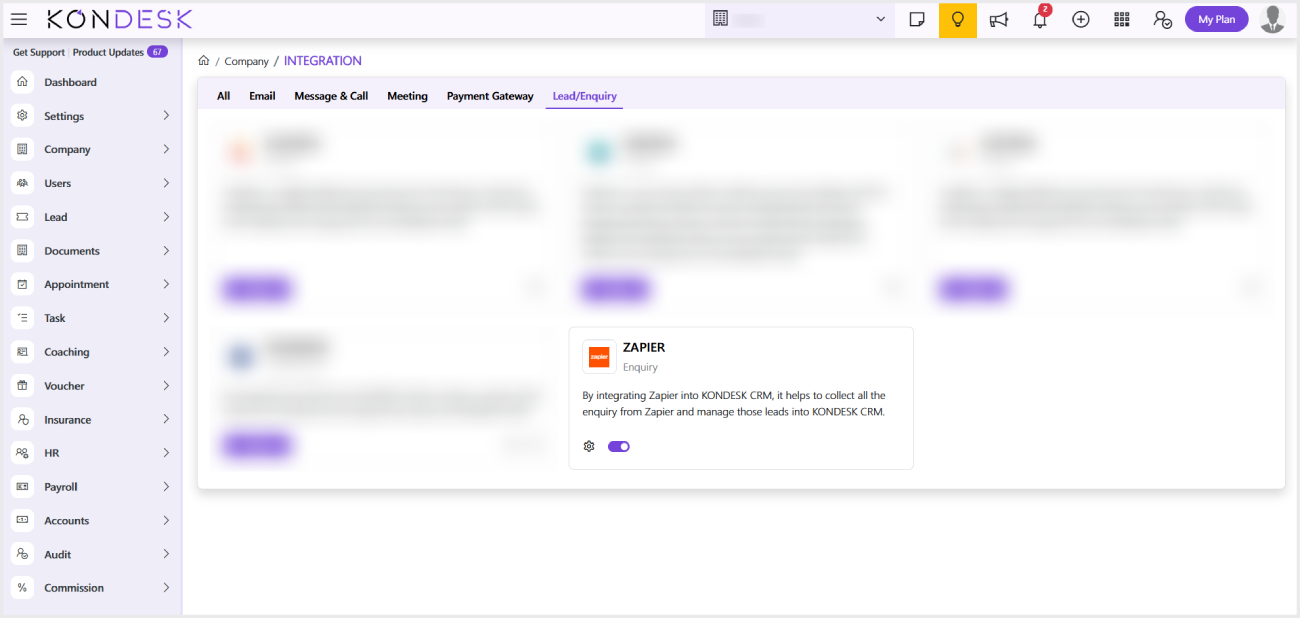
Step 8 : In KONDESK, From the left-hand side menu, click on Company and Select Integration.
Step 9 : The system will open a card view for all the available integrations in the CRM together, and can also be viewed under their respective categories.
Step 10 : Of all the available integrations, on the Zapier Card, click on the Settings icon and activate the Integration.
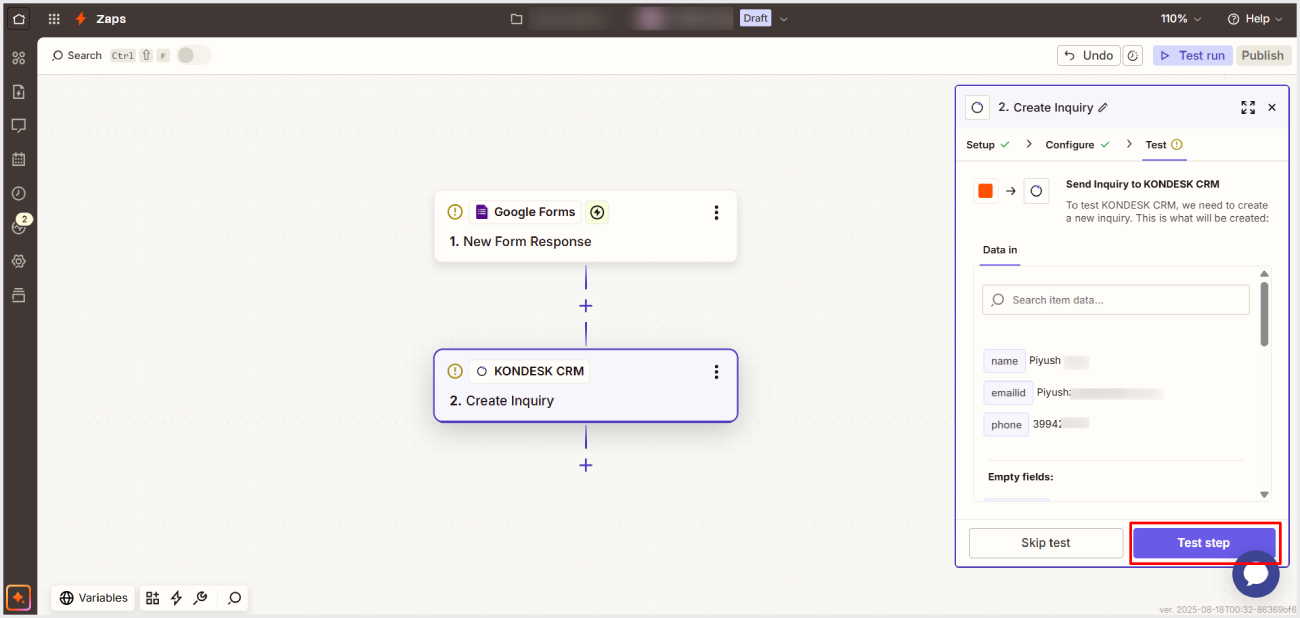
Step 11 : In Zapier, go to the Test tab and click on “Skip Test”.
To properly test the feature, enter sample data in the Configure tab instead of using mapped fields.
For example, in the First Name field, enter “Rahul”.
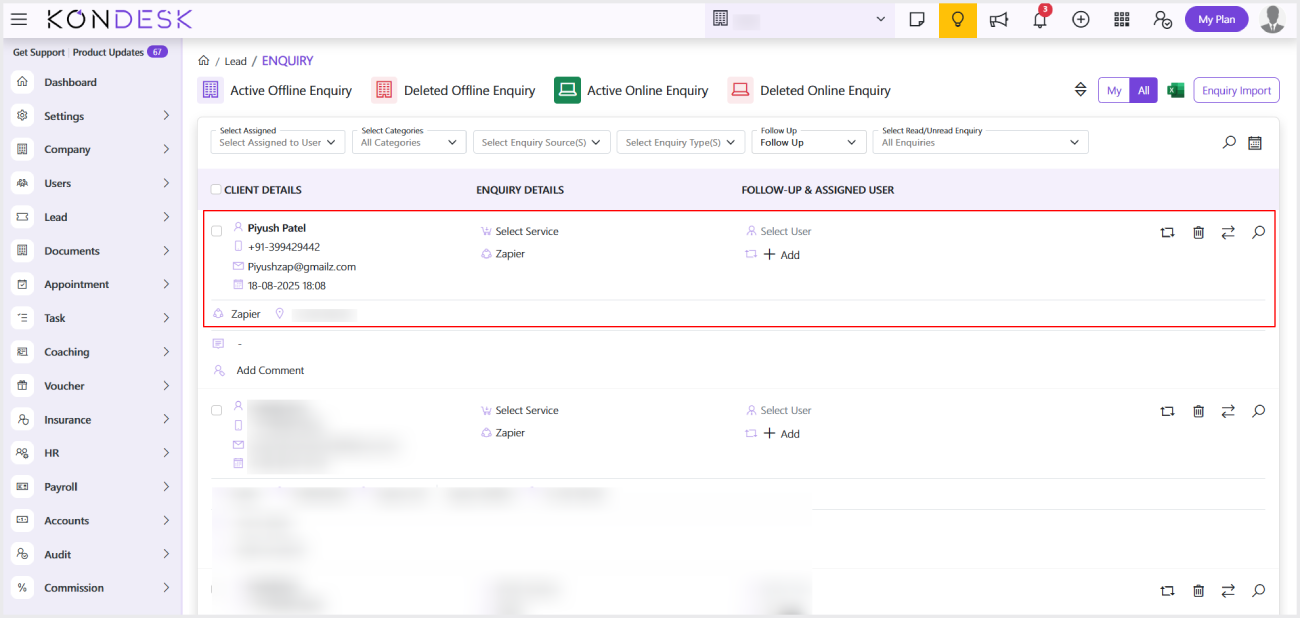
If the test is successful, an enquiry will be created in KONDESK under the Active Online Enquiry tab, with the enquiry source displayed as Zapier.